Buy 3 wallstickers or posters and pay for just 2!


Wallsticker – Pink House
Storystickers - several sizes - Ikea
€24.00
ID
1293
-
 Free shipping
 -
 Delivery 4-7 days
 -
 100% Satisfaction guaranteed


We all love a really good DIY. These houses are designed to fit the doors on Ikea's cabinet Ivar, the wardrobe and wall cabinet.
; Choose the size you want, see the pictures to see which size fits your furniture.
Of course, you can put the houses directly on; the wall too!
Four nice houses in a nice color scale are included in the set
The wall decals are produced on an environmentally friendly, printed on reusable wall foil that makes the wall decals last a long time, and can be moved! Mounted with simplicity on solid smooth surfaces and leaves no ugly marks. Explore our large selection of wall stickers and choose your favourites. You easily create a magical children's room
Produced and printed in Sweden. Illustrated by Storystickers, Mathilda Jungevall

If your wall is freshly painted, wait a minimum of 3 weeks after the last painting session before applying wall decals. Before applying the wall decor, the surface must be completely dry. Moisture can impair adhesion and reduce the longevity of the decal.

Clean the surface where you intend to apply the wall decor. Ensure that the surface is 100% dry before mounting. Our wall decal is suitable for smooth, solid, and non-porous application surfaces. The surface should be in good condition at the time of installation to avoid the risk of damage during removal.
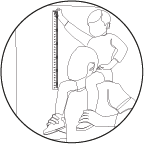
Visualize where you want to place your wall decal. If it is intended to be aligned with an object or a baseboard, measure where the highest point of the wall decal should be positioned.
Do your wall decals have smooth contours and are less complex in shape? Simply separate them from the roll and place them directly on the wall. Watch the video. You can then disregard the rest of the instructions.

If you have a larger wall decal or a decal with a complex shape, please follow the rest of the instructions. You can also fnd a video for the more complex installation further down on this page.

Let the stickers remain on the sheet. Cut out the larger sticker, and it doesn't need to be neat; you're doing this solely to facilitate the installation. However, exercise some caution to ensure you don't accidentally cut inside the sticker's contour lines.
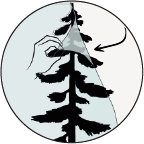
Lift one corner of the sticker section you've cut out. Remove the excess sticker material with great care, leaving the actual sticker on the sheet.

Time for installation!
Start at the top of the sticker. Separate the top of the sticker from the sheet. Apply the top of the sticker to the wall and smooth it down with your palm. Fold the sheet backward in an arch and then peel it of bit by bit while using your other hand to press the sticker surface against your wall.

Check to ensure the entire wall sticker is in contact with the wall. Use your hand to smooth over the entire surface of the sticker several times. It can take up to a week for the wall stickers to fully adhere once they have been applied. During the frst week, you may need to press them a few times by placing your hand on them and smoothing them down.

Great job! You have now completed the installation and given your room a completely new look. If you have any further questions, please feel free to contact our customer service.

All wall decals are recommended for children aged 3 and up. The product is suitable for indoor use. If you don't apply the decals immediately, please store them out of the reach of children. The decals should be applied to a smooth surface where the entire decal makes contact with the surface. There should be no air gaps when you've installed the decal on the wall, as this will reduce adhesion, and the installation won't be reliable. Our wall stickers can be repositioned during installation but should then stay in the same place, as each movement can add dust and dirt particles that can lower the adhesion.